Feeds:
Posts
Comments

{Recipe} Kimchi

Summer flew by and fall is already catching me off guard.  Sorry that blogging hasn’t been a priority for me lately.  I’ve been busy with: closing up my store, starting to work in the deli at our local Co-op, gardening, preserving & canning.  I hope you all are doing well!  🙂

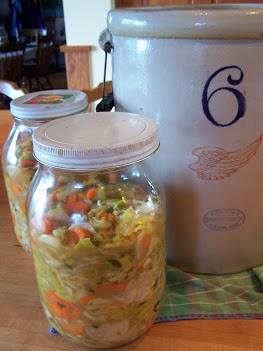
The other week my Mom and I decided we should use up some of the garden bounty we had and make kimchi.  I’ve had kimchi a couple of times and always enjoyed it.  Compared to others I think our first batch turned out great.  We toned down the chili paste so the garlic and ginger comes through more.  I’ve been eating it as a condiment to most meals and find it rather addicting.

Batch of Kimchi

Batch of Kimchi

{Recipe} Kimchi
4 Napa Cabbage Heads
4 Daikon Radish, peeled and sliced thin
10 Carrots, peeled and sliced thin
2 Scallion Bunches, sliced
4″ of Fresh Ginger, minced
4 Garlic Heads, minced
1/2 cup Fish Sauce
1/2 cup Chili Paste (adjust up in you like it spicier)
2 cups Sea Salt + 1/2 Cup Sea Salt

Wash the cabbage leaves and let soak in a brine made with the 2 cups sea salt and 2 gallons water.  Let soak for 12-24 hours.  Pour the brine off the leaves and chop the cabbage into 1×2″ strips.  Mix the cabbage with the daikon, scallions, carrots, ginger, and garlic.  Add the fish sauce, 1/2 cup sea salt, and chili paste to the cabbage mixture.  Blend well.  Mash the mixture into a large jar or crock.  Pack it tightly and the vegetables should release enough liquid to cover themselves.  If they don’t you can make a brine (2 T sea salt per quart of water) to cover.  Weigh the vegetable down under their brine with a plate, clean rock, etc.  Cover with a thin towel and let ferment at room temperature for a week or more.  Store in the fridge and enjoy!
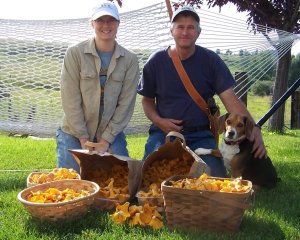
One of my favorite activities is foraging for wild mushrooms*.  Every time I get to go the image of a big Easter egg hunt in the woods pops into my mind.  🙂

When I was younger my Dad and I would go on forays with a local mycologist.  The group would pick any fungi we could find and everyone would come back together to learn how to identify them.  Those classes have left me very comfortable picking a selection of edible wild mushrooms.

Right now the chanterelles are out in Montana.  It’s pretty dry so they aren’t too big or prolific but my stash needed to be replenished so I had fun picking a basketful over the weekend.  Chanterelles do dehydrate well but I don’t like the texture of dried mushrooms so I froze mine for storage.  Below is a short slideshow of my process.

This slideshow requires JavaScript.

Do you like to forage for wild foods?

*Please don’t ever pick and consume wild edible unless you know what you are doing!

I wish it would rain so we could get a haul like this again 🙂

c

Our best haul ever, 2009!

So sorry I haven’t been posting much on here this year but there’s been a lot going on.  My Mom and I decided it’s a good time to start a new chapter in our lives and are closing our Italian Market after 7+ years of being in business.  It was a great experience, we learned a ton and did well.  But after all that time we are ready for a change!  This was the last month of retail business and then I’ll be busy wrapping up all the loose ends of owning a business.

mom&i

Those 7+ years sure flew by!

Other things that are keeping me busy are gardening, foraging, hosting a monthly food swap & starting a special diet for… preconception!  My husband and I are super excited to start down the path of starting family.  🙂

We also are taking a road trip in early July to see my husband’s side of the family.  It will be nice to take a long break and get out of town.  I’ll have to take some pictures of all the food we are packing as eating on the road with a special diet can be challenging.

I hope you all are enjoying your summer so far and I should be posting more in the coming months.

Sorry for not posting much this winter/early spring.  My husband and I are almost done going through our entire apartment.  We’ve done some construction projects, thoroughly cleaned, decluttered & organized every square inch.  It will be so nice to be done with that project!  I’ll post some pictures after we do the final cleanup.

Meanwhile, on the homesteading front… I’ve started a few garden plants inside and will start planting cold weather crops in my garden space soon.  The meat chickens at my parent’s are almost ready to be harvested & our meat cows are busy eating grass and will have a nice long summer ahead of them to fatten up.  🙂

This coming weekend I’m hosting another Food Swap in Bozeman so I decided to make some tasty mustard to trade.  I’m sure I’ll bring a few other items but my jam and dried goods supply from last year is starting to run low.

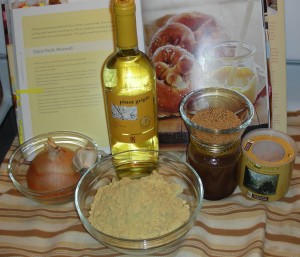
Mustard Fixings

Mustard Fixings

{Recipe} Honey-Dijon Mustard
(Adapted from ‘The Art of Preserving’)
2 cups mustard powder
3/4 cup filtered water
1 bottle dry white wine
1 onion, chopped
5 garlic cloves, minced
3 tsp sea salt
3 Tbsp honey
3+ Tbsp whole mustard seeds, optional

Whisk mustard powder and water together in a bowl.  In a saucepan combine the wine, onion & garlic.  Bring to a boil over high heat, add the sea salt, reduce heat to medium, and simmer for 20 minutes.  Put a strainer over the mustard mixture and add in the flavored wine.  Compost the onion/garlic or add to a pot of soup.

Whisk the mustard mixture well and add the honey.  Put the mustard back into the saucepan and simmer for 10-15 minutes or until it reaches your desired consistency, stirring frequently.  If adding the mustard seeds, put them in for the last 5 minutes of cooking.  Ladle into jars and store in the fridge.  The mustard is best after sitting for a couple weeks and will last a year.

A Couple Batches of Dijon-Style Mustard

A Couple Batches of Dijon-Style Mustard

Have you ever made mustard?  I’m looking forward to experimenting with this recipe later this year to make a fruit mustard… huckleberry or rose hip perhaps?

I’m a sucker for items that can be dipped into or spread on any variety of foods; as you can probably tell from my ever growing Pinterest Board of appetizers that are mostly dips.

pint copy

Salsa, hummus, pesto, pate, dips… are all great to pair with one of my other favorite items, crunchy food!  Chips, crackers, pretzels, raw veggies… oh my!  With the Super Bowl last weekend and a WAPF potluck I had some great opportunities to get a few recipes off my “to make” list.  I didn’t have my camera with me so I only got a few pictures of the pate while I was making it, sorry!  Everything turned out delicious so I wanted to share links to the recipes I used.  They are definitely going into my pile of keeper recipes.

* Beer-Cheese Dip – I made this with raw sharp cheddar but it didn’t look as cool because the cheddar wasn’t dyed.  It was great with some thick pretzels dipped in and I’m going to put some of the leftover dip on burgers later this week, yum!

* Moroccan Carrot Dip – this was really good!  Even though the carrots are cooked they stay a really bright color and don’t have that gross cooked carrot taste.  I let it cool and then put it in my food processor so the texture was a little more fluffy then their picture.

* Chicken Liver Pate – I’m still trying really hard to eat liver on a regular basis.  So far I’ve been able to handle swallowing frozen, raw elk liver “pills” but most of the other dishes I’ve made are hard for me to swallow.  I’ve liked a few purchased liver mousses so this recipe with awesome ingredients like bacon and apples made me give it a go.  It was very mild and I’m actually excited that there are still 2 small bowls in the freezer that my husband and I can enjoy later.  When we do I’ll try and get some better pictures.

Did you make any delicious apps for Super Bowl that I should put on my “to make” list?  🙂

Being on the GAPS diet has left me with a ton of egg whites that I didn’t want to throw away.  I’ve been freezing them daily with the plan on making a dessert out of them for Thanksgiving.  Angel food cake was always my choice of birthday cake growing up and it’s been a while since I’ve had one so that was my choice.

Made early in the week & stored in a tin.

To make it a little healthier I used sucanat (evaporated cane juice) as the sugar and a local, whole white wheat pastry flour.  It ended up not rising as high but it was still awesome.  The molasses flavor of the sucanat came through and the darker flavor of the whole wheat was really nice.  Topped with a ginger-berry compote & whipped cream made it Thanksgiving worthy (I wasn’t suppose to eat any of the cake but I had to try it)!  Later in the evening on Thanksgiving my parent’s had the leftovers without any of the toppings, they just wanted to taste the cake.  It really was delicious!

I wish I had a piece right now!

{Recipe} Angel Food Cake
(adapted from Martha Stewart)
1 cup whole white wheat pastry flour
1.5 cups sucanat, ground fine in food processor
1-3/4 cups egg whites, room temp
1 Tbsp warm water
1/2 tsp sea salt
1 tsp cream of tartar
1 tsp vanilla extract

Preheat oven to 350*.  Sift flour, salt and half the sugar together.  In a mixer beat the egg whites and warm water until foamy; add the cream of tartar and beat until soft peaks form.  Gradually add in the other half of the sugar and vanilla.  Beat until stiff peaks form.

Gently fold the flour mixture into the egg whites in 6 batches.  Gently spoon the cake batter into an ungreased angel food pan.  Run a knife through the batter to break up any air bubbles and smooth the top.  Bake for 35-40 minutes or until golden brown and the cake springs back.  Invert on pan’s legs or a bottle for an hour to cool.  Run a knife around the pan to remove it and let cool completely.  Store in a tin.
*** Note: the cake was a little moist so I didn’t cover it tightly for the few days it hung out until Thanksgiving.

Having a freezer full of local fruit comes in handy!

{Recipe} Ginger-Berry Compote
(adapted from Martha Stewart)
1.5 pounds frozen berries (I used: cranberries, sour cherries, huckleberries, blueberries & strawberries)
4 Tbsp sucanat
2 tsp grated lemon zest
2 tsp grated fresh ginger

Place everything in a saucepan and cook until the berries are soft, about 10 minutes.  Cool and store in fridge until ready to serve on cake.

At the last food swap I went to I got a large box of indigo rose cherry tomatoes.  I was going to dehydrate them but then I decided to make tomato paste & dehydrate it.  I cooked down the tomato puree until it was thick and then spread it on Silpats in my dehydrator.  After an evening of drying they were dried out and ready for storage.

This slideshow requires JavaScript.

The tomato leather smells so good!  It will be fun to pull a piece off, add hot water & use for any number of things.

My parent’s counter was getting too full of tomatoes at the end of the growing season so my Mom & I made up a batch of tomato sauce to enjoy over the winter.

I used this recipe from Better Homes & Gardens because the brown sugar & balsamic vinegar will really help take the bite out of the amount of lemon juice you have to add to each jar.  Plus the fresh herbs (basil, rosemary, parsley, lemon thyme & marjoram) will really make this a bright & summery sauce to enjoy when the snow starts to pile up!

Bring on the pasta!

It’s time for you to be put into the spotlight!

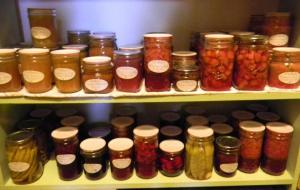
♦ 2011 Pantry Round Up ♦

It’s that time of year again!  Please e-mail me pictures of your pantry/freezer/dry goods/etc so we all can swoon over the food you’ve preserved this summer.

If you’d like to contribute, please e-mail: nicholeati (at) yahoo (dot) com.

Please include: pictures, your name, blog/website if you have one & what’s in the pictures! I’ll compile them all and show them off here and on my Facebook page.

Check out last year’s album is here: 2011 Pantry Round Up

My parent’s have a few lovely crab apple trees that line their driveway.  I love when they start to turn bright red and after last year’s harvest I was excited to put more of them up again.  Last year I dried a few large bucketfuls & fermented some (I didn’t really like the texture they ended up at).

I picked a large bucketful on Monday and half of it went into my steam juicer.  I cut off the blossom end, stem and cut them in half.  I used my knife tip to remove all the large seeds because I knew I wanted to use the mash that was left over.  I let the steamer go until I had 7 cups of juice and I put it into the fridge because I’m not a fan of canning into the wee hours of the morning 🙂

I love the beautiful color!

{Recipe} Crab Apple Jelly
(full USDA directions here)
7 cups crab apple juice
7 cups organic sugar

Start to heat up the juice and slowly stir in all the sugar to dissolve it.  Bring the mixture up to a boil.  Use a candy thermometer to watch when it’s at a full boil and let it go until the mixture is 8 degrees F above that temperature.  Remove from heat, quickly skim off foam, and ladle into sterile, hot canning jars.  Put on lids & rings and process in a hot water bath for 10 minutes (for 5k’ elevation).  Let cool and check seals.

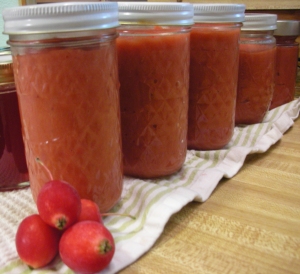
A nice fruit butter with a little zing!

The steam juicer basket was full of beautifully mashed crab apples so I decided to make some crab apple butter with the remains.  I ran the mash through my chinois to remove the skins and core pieces.  Making 2 quarts of puree was enough of an arm workout so I stopped there 🙂

{Recipe} Crab Apple Butter
(adapted from Preserving in Today’s Kitchen)
2 quarts crab apple puree
4 Tbsp sucanat or organic sugar (add more if you want it sweeter)
1/8 tsp ground ginger
1/4 tsp ground cinnamon
1/4 tsp ground coriander

Put all of the ingredients into a dutch oven or heavy bottomed pot and heat to a boil.  Simmer until you reach your desired consistency.  Put into jars, cool and freeze for later use.
* Note: I’m sure you could can this but I didn’t feel like it.

I plan on drying a few batches of crab apples again, I love snacking on them.  If I get really motivated I might make a crab apple marmalade that was also in the Preserving book linked to above & some pancake syrup.

How do you put up crab apples?